

Create Edgy To-Do or Checklists with Check boxes in Excel + Shortfall calculator
The ones who like to plan adores to-do lists as well. And if you are also the one who likes to strike a line or tick or dash or mark then this tutorial is for you.
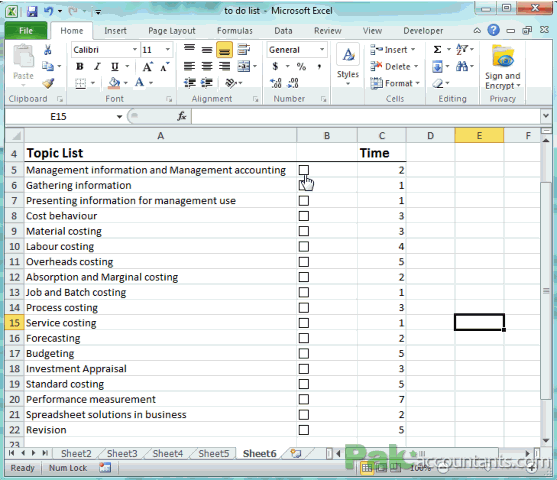
As I teach ACCA and other professional qualification students and at the same time teaching several subjects it is hard for me to remember what chapters/topics we have done so far. So until recently I used to make a list and have to confess all of them were on drafting pad (because I live to that draw dark line to mark the work done!) but since I started Excel tutorials I made all those lists in Excel. Now I can check the topics I have covered so far and next time I open the fine I instantly know what to do next! Following is a snapshot of one of my chapters to-do lists (for ACCA F2 Management Accounting to be specific)
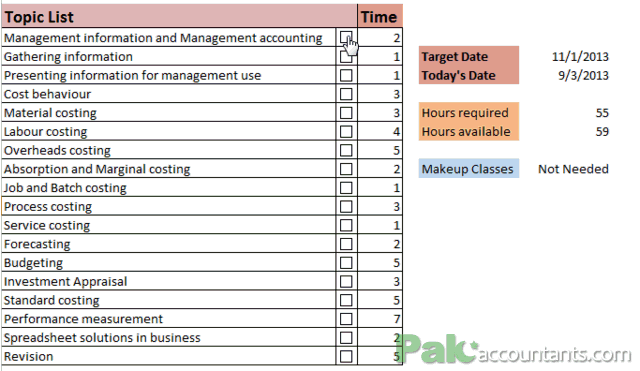

Well yeah they are cool and in addition to that I applied conditional formatting that makes cell changes its color when the relevant box is checked. And in the end I also have a mini calculator that lets me know if I can still relax or I have to schedule some make up classes to finish the course by specific date as it tells me exactly how many days/hours I have to manage.
So how is that all done lets learn and excel at something new in Excel today!
View Contents [hide]
- Preparing data
- Opening the gates to Oasis! – Discovering Developers tab!
- Adding Awesomeness – Check boxes!
- Making check box work
- Let the check be TRUE as FALSE is meant to be unchecked!!!
- Applying conditional formatting – Highlighting the topics completed when checked
- Cleaning up! – Hiding TRUE/FALSE
- Final touch – Mini calculator
Preparing data
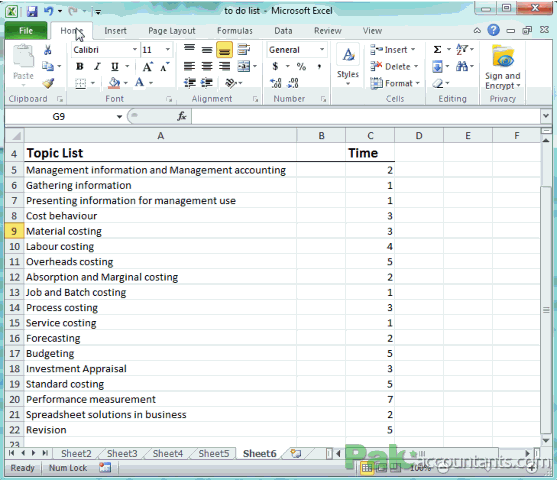
I have listed down all the chapters/topics I have to cover. I intentionally left one column blank and then listed the time in days I require to finish one area of the syllabus. Later I will use the check boxes (that I still have to insert) and the days mentioned to calculate the days. Not getting it? Continue reading 
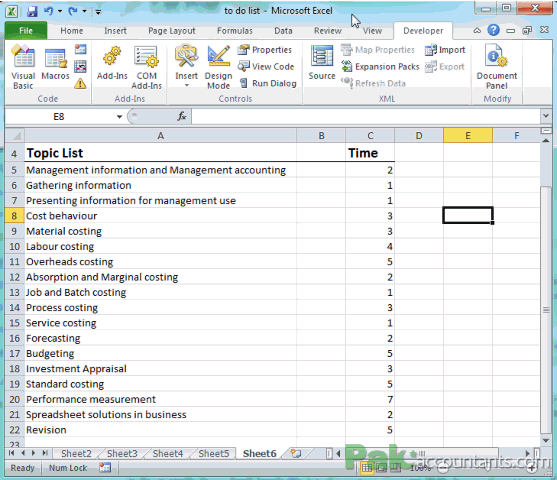
Opening the gates to Oasis! – Discovering Developers tab!
By default you don’t see this tab among others. But if you know the way you can find Developer Tab. Follow these steps:
Step 1: Right click anywhere in the ribbon (better yet to right click on any tab) and select customize ribbon.
Step 2: From the dialogue box that appear in the list on the right, find “Developer” check box and check it.
Step 3: Click OK. You will have a new tab with the name Developer.
Adding Awesomeness – Check boxes!
As we have a developer tab with us, now we can add check boxes. Check boxes are basically one of the form controls available in Excel. To add check boxes go through following steps:
Step 1: Go to developer tab > Controls group > click Insert drop down > under form controls sub-group click check box icon. Cursor will change into a plus sign. This is a similar icon that you get if you have to draw any shape like, square, circle etc.
Step 2: Go to cell B4 and having the cursor right on the top left corner of the cell click once.
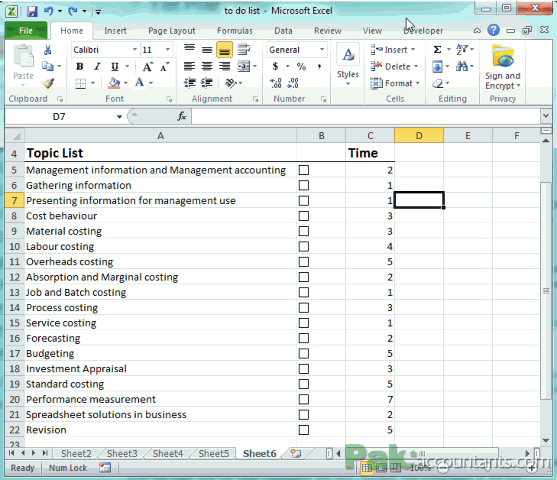
Step 3: Now you have one check box with caption ‘check box 1’. To get rid of the caption or name right click the check box, click once inside caption and use delete and backspace key to completely remove it. Now you are left with just a check box which if you click will have tick in it and if you click again it will be unchecked.
Step 4: But we need the similar check box for other topics as well. To do this simple make the cell active in which check box is inserted and drag the fill handle down and it will copy the check boxes. This definitely saves you a lot of time as you don’t have to go to developer tab to insert each check box.
Following animation walks you through all the steps:
Making check box work
At the moment these check boxes are literally useless. We want them to actually turn on/off things if we click them. To make them work we have to link them to certain cell where they can operate or which they can control. To do so follow these steps:
Step 1: Right click on first check box and from the menu select format controls.
Step 2: Click once in ‘cell link’ range box and click the same cell in which the respective check box resides. In my case I selected the check box in cell B4 and thus linked that check box to the same cell where it sits i.e. B4. Excel makes the address absolute by default. Keep it that way as it will not hurt our purpose at least.
Step 3: Repeat Step 2 for all the check boxes by going to format control dialogue for each check box and linking it to its home cell.
Let the check be TRUE as FALSE is meant to be unchecked!!!
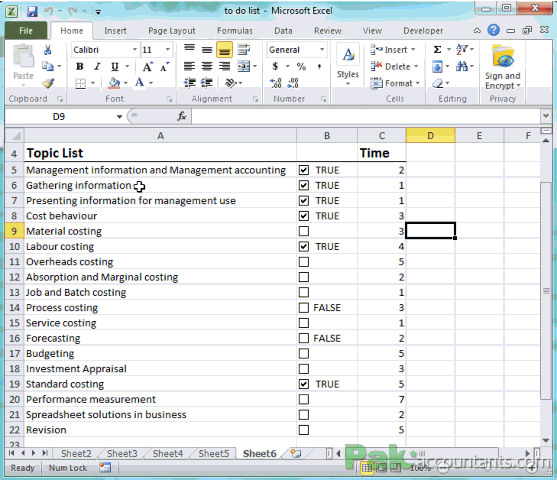
Linking each check box to individual cell is a tiring job. But its well worth the effort. So by the time you correctly link all the check boxes with individual cells you will be able to have TRUE and FALSE for each cell depending on the status of check box in that cell.
Lets test fire our check boxes and especially to check our pains taking effort of linking the cells. If you check mark the box the cell will say TRUE and if you uncheck it FALSE will be displayed. This must be the case with all the check boxes and the respective cells.
As the value of cell changes TRUE/FALSE on click we can use it now.
Applying conditional formatting – Highlighting the topics completed when checked
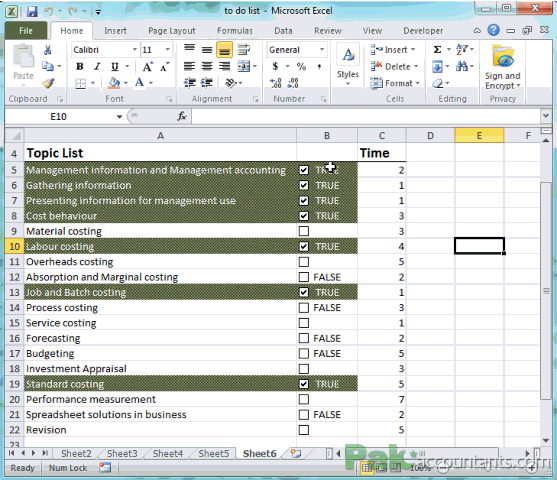
Once the cells are linked and working as wished i.e. showing TRUE and FALSE status when clicked now we can use them to highlight, cross the topic that has been completed and thus checked with a tick mark in the box.
Step 1: Select the range of topics with the check boxes. In my case I selected A5:B22 i.e. from cell A4 to cell B21.
Step 2: Go to Home tab > Styles group > click Conditional formatting drop down and select new rule from the menu
Step 3: From the dialogue that appears select the last item in the list in the top half of the dialogue box that says “Use a formula to determine which cells to format” and put this formula in the range bar:
=$B5=True
Click the format button to format the cell the way you like it to show once you tick the check box. I chose a shade of green color and also added a pattern with white font color.
Click OK button. A new rule will be added. Now if you select the check box then the respective row will change the color and if you uncheck it the formatting will be removed.
Following animation help you execute the steps above:
Cleaning up! – Hiding TRUE/FALSE
TRUE and FALSE statements as we click check box are doing good for us but having them on display is actually cluttering the space. It will be good if you simply have the check box with no TRUE and FALSE visible. To hide it you can use Custom Formatting option for this.
Remember conditional formatting and custom formatting are two very different things.
Step 1: Select the cells containing check boxes and hit Ctrl+1. Custom format dialogue box will open.
Step 2: From the list at left select custom and in the type field insert three colons as follows and click OK:
;;;
This will hide the TRUE and FALSE values to show up in the cell. Now adjust the column width just enough that each cell house the check box elegantly.
Final touch – Mini calculator
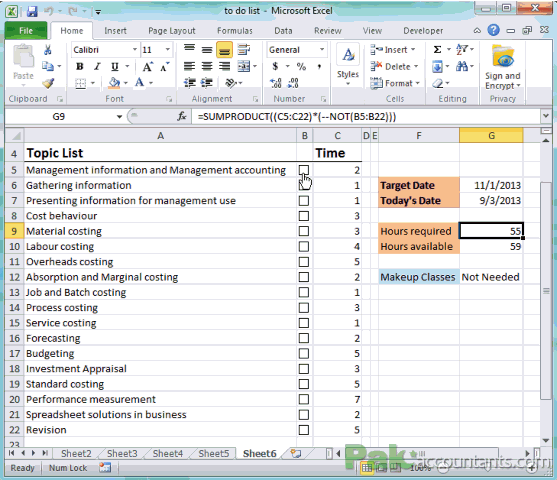
That wasn’t part of the to-do list before I wrote this tutorial. But as I planned for it, idea springs to mind of having a simple calculator that finds the days left until target date and hours/days required to cover the course. This way I will know if I have to arrange make up classes. It is for this I needed the information on how many days I require to cover specific topic.
In total I need 55 days to complete the course. As each class is one hour long so it basically mean 55 hours in total.
But I want the days/hours to reduce as I complete one or more topic and I need it to reduce by the time mentioned against each topic. For example if first topic is finished then I only need 53 more hours to complete the rest of the course and so on.
To do this I put the following formula in cell G9. This is basically conditional SUM formula. To learn more on conditional SUM read this page.
=SUMPRODUCT((C4:C21)*(--(NOT(B4:B21))))
Now as you select a check box the time reduces by the hours mentioned in the respective cell of time column.
I also need to calculate the days I have until the target date from today’s date. I will compare this result with the days I need to finish the course to determine if make up classes are necessary and if yes then how many. To get this done I put the target date in cell G6 and put =TODAY() function in cell G7. And then in cell I simply deducted the target date cell from today’s date cell to get the remaining days until last date in cell G10.
In cell G12 I put this formula:
=IF(G10>G9,"Not Needed",G9-G10)
This formula checks if value in cell is greater than the value in cell then I don’t have to arrange make up classes and thus shows Not Needed message otherwise it will tell me how many hours I have to make up.
After implementing about formulas in place, here is the final product:
📤How to Download ebooks: https://www.evba.info/2020/02/instructions-for-downloading-documents.html?m=1


