
Now – let’s begin learning Microsoft Excel Online!
Now – let’s begin learning Microsoft Excel Online!
Below are the basic steps to know about excel-like what is rows, columns, excel spreadsheets, excel workbook and how to use them are given below.
Excel Basics No 1.
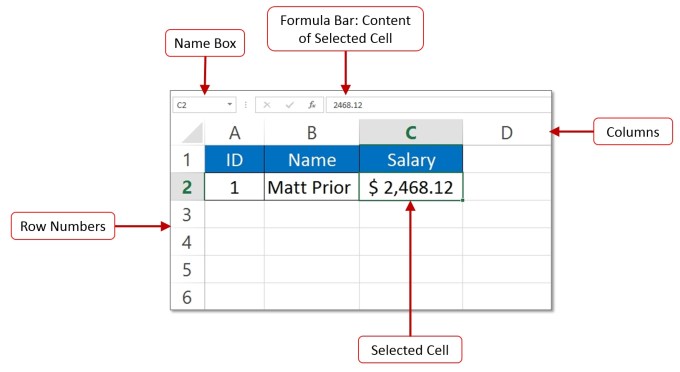
An Excel Spreadsheet is a two-dimensional grid; Rows and Columns:
Moving from Cell to Cell:
The arrow keys can be used to move left, right, up, and down from the current cell. Press the Enter key to move to the cell immediately below the current cell, and press the Tab key to move one cell to the right.

Excel Basics No 3.
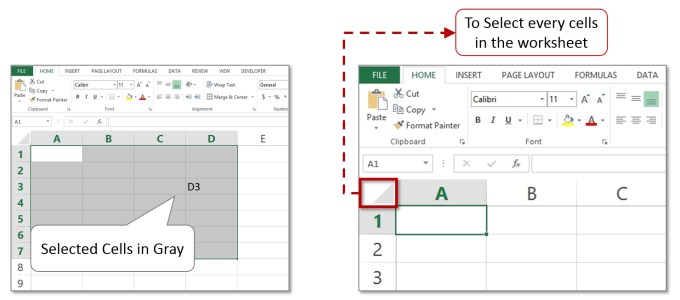
There are a variety of ways to select cells in an Excel spreadsheet:
- To select one cell, click in the cell.
- To select one or more rows of cells, click on the row number(s).
- To select one or more columns of cells, click on the column letter(s).
- To select a group of contiguous cells, click in a corner cell and, with the left mouse button depressed, drag the cursor horizontally and/or vertically until all of the cells you want to be selected are outlined in black.
- To select multiple cells that are not contiguous, press and hold the Ctrl key while clicking on the desired cells.
- To select every cell in the worksheet, click in the upper right corner of the worksheet to the left of “A.”
Excel Basics no 4.
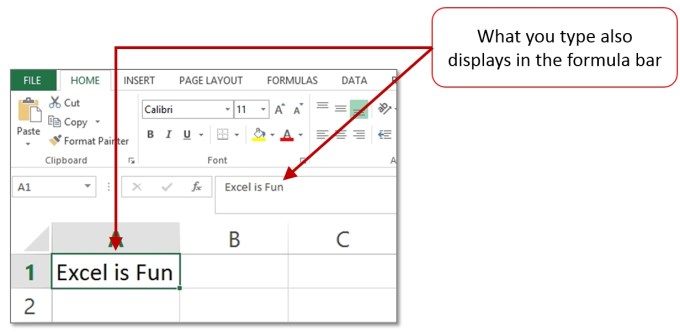
To enter data into a cell, just click in the cell and begin typing:
What you type also displays in the Formula Bar. When entering dates, Excel defaults to the current year if the year portion of the date is not entered.
You may edit cell contents from the Formula bar, or from directly inside the cell. To edit from the Formula Bar, select the cell and click on the Formula Bar. When done typing, either press the Enter key or click inside another cell. To edit directly inside a cell, either double click inside the cell or select the cell and press the F2 key.
Excel Basics no 5.
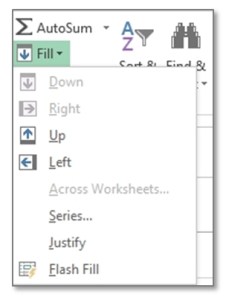
There are multiple ways to fill data from one cell to adjacent cells:
Now you may copy cell to adjacent cell as mentioned below:
- Home ➪Editing➪Fill➪Down or press Ctrl+D copies cell to the extended cell bellows.
- Home ➪Editing➪Fill➪Up copies cell to the extended cell above.
- Home ➪Editing➪Fill➪Right or press Ctrl+R copies cell to the extended cell right.
- Home ➪Editing➪Fill➪Left or copies cell to the extended cell left.
Excel Basics no 6.
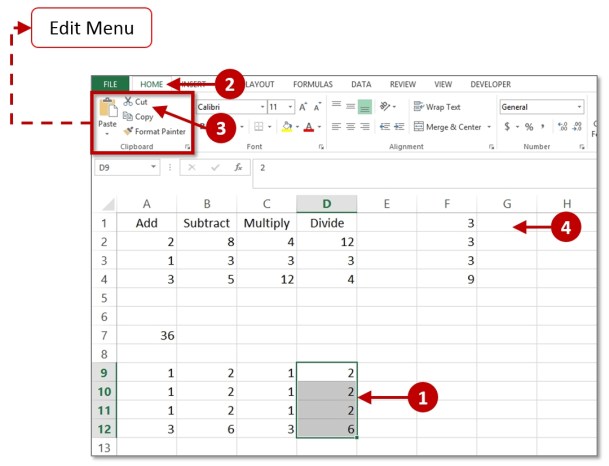
Move Data using Cut & Paste:
When you move data to another location, the data is removed from its original location and placed at the location you specify. To move the entire content of a cell using the Edit menu:
- Open the worksheet you want to modify.
- Select the cell you want to move.
- From the Edit menu choose Cut.
- Select the cell you want to move the data to. This cell is called the destination cell.
- From the Edit menu choose Paste.
 Excel Basics no 7.
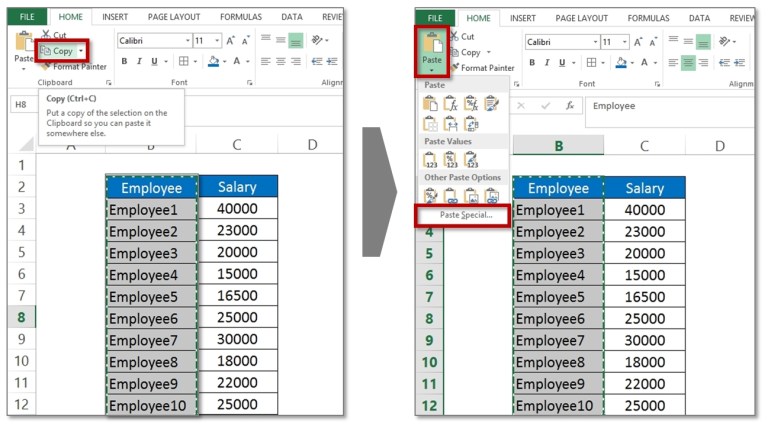
Copy Data using Copy & Paste:
You may want to have the same information in several places within the worksheet. It is best to Copy and Paste the information instead of retyping it.
To copy the entire content of a cell using the Edit menu:
- Open the worksheet you want to modify.
- Select the cell you want to move.
- From the Edit menu choose Copy.
- Select the cell you want to copy the data to. This cell is called the destination cell.
- From the Edit menu choose Paste.
- Information gets copied from the original cell and is placed in the destination cell.
Excel Basics no 8.
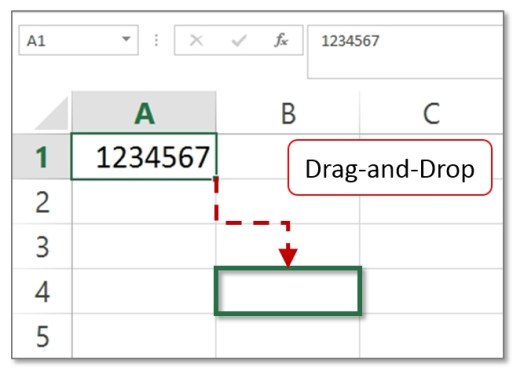
Move Data using the Drag & Drop method:
Drag and Drop is another way to move data around in your worksheet. It is faster but requires a little practice.
- Select the cell that contains the data you want to move
- Point to the edge of the cell. The pointer will take the shape of a 4-headed arrow (Windows) or an arrow (Mac).
- Drag the cell where you want to move the data. As you drag, a cell outline will show where the data will go when you release the button.
- Release the mouse button when the pointer reaches the destination cell.
- The data is removed from its original location and placed in the destination cell.
Excel Basics no 9.
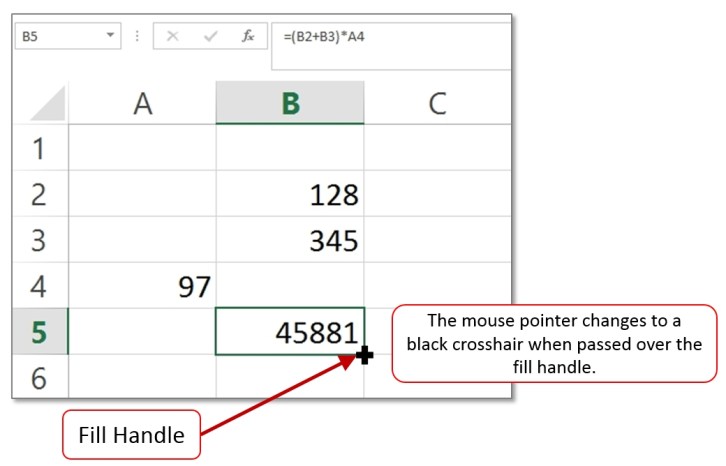
Use the Fill Handle to copy information:
When you need to copy data or formulas down a column or across a row, you can easily use a ‘Fill handle‘ to complete your task. A fill Down handle is located at the bottom right corner of a selected cell. It appears as a small box. When you select the fill down handle, your cursor changes to a plus sign.
- Select the cell that contains the data or formula you want to copy.
- Point to the bottom-right edge of the cell. The pointer will change to a plus sign.
- Drag the fill down handle to the adjacent cells where you want the data or formulas to be copied.
- Release the mouse button.
- Data is filled in appropriate cells. If you had copied a formula, the results should be correct.
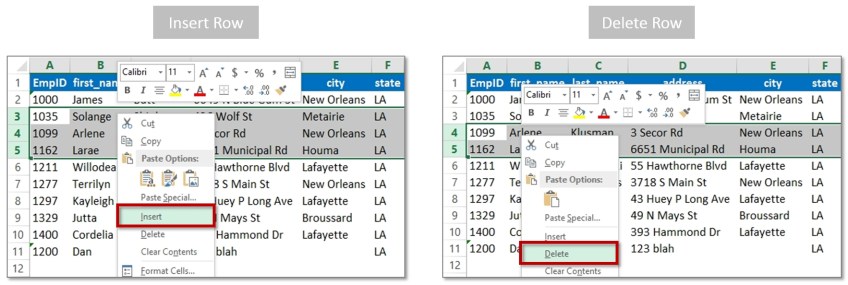
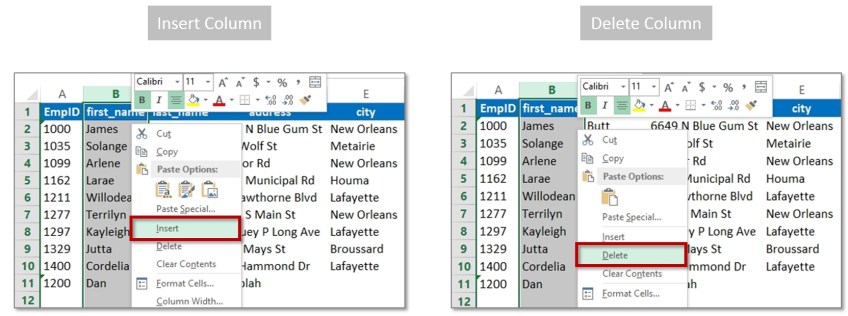
Excel Basics no 10.
Adding and Deleting Rows and Columns:
- To insert a new row in a spreadsheet, right-click on a row number, and click Insert. Excel always inserts the row ABOVE the row that was clicked on. To delete a row, right-click on the row number, and click Delete.
- To insert a new column, right-click on a column letter and click Insert. Excel always inserts the column to the LEFT of the column that was clicked on. To delete a column, right-click on the column letter, and click Delete.


Leave a Comment